October 22, 2013

Sweater Dress

Material: ¾ Yard of fabric, thread to match

Time: 6 hours


I had this old light blue sweater that was given to me by my mom. It was a little too soccer mom-ish for me so it just sat buried in the back of my closet. I recently pulled it out and came up with a project to turn it into a dress for fall. We are having beautiful fall weather right now, and I have been enjoying wearing all kinds of skirt-and-tights combinations. The nice weather is supposed to last clear till this weekend, so I wanted one more outfit.
 

I chopped off what I considered to be the most hideous part of the sweater, which was the collar. I also cut the sleeves and made them short. I unraveled one of the sleeve to use the yarn for the next steps. To finish off the short sleeves, I unraveled them until both were the same length and ended in a single row of open knit loops.


I took a yarn needle and threaded a piece of yarn through each open loop to stop the unraveling, and stitched the ends, making it a little extra tight to give the sleeves some puff.


Next I took a strip of ribbon made of a material which I cannot name (see the picture), and wrapped the yarn around it 3 times. I took a very thin piece of ribbon and sewed it down the middle on the machine, and then cute the edges on both sides with a razor knife. Then I cut and removed one side of the ribbon strip. The result was a long fuzzy stretch of yarn which I was then able to hand-stitch to the edges of the sleeves and neck of the sweater.
 
The sweater on its own could have been a refashion, but I wanted it to be a dress, so I made a quick trip to a fabric store I really like here in Portland. I picked out polka-dot patterned fabric in a similar shade of blue for the skirt bottom. As I explained my project to the store attendant she advised me to get a walking foot for my sewing machine, because sewing knit on cotton could lead to bunching up of the fabric due to differences in how easily they are pulled by the machine. The walking foot pulls the fabric from the top so both top and bottom get pulled at the same speed. So I followed her advice, and was amazed with how well the walking foot worked! It even allowed me to sew in much straighter lines too! I had always thought my sewing skills were not very good, but now I realized that part of the problem was the machine – not me. That was definitely something worth finding out. Now I’m feeling more empowered to tackle a more challenging project. To finish the dress, instead of hemming the skirt, I stitched a thick embroidered line across the bottom and trimmed the remaining fabric.
This dress turned out to be a lot more work than I had anticipated, but it was worth every minute spent on it. It has become one of my favorite refashions! I wore it together with my bird’s nest necklace to my friend K’s twins, J and T’s birthday party.


October 21, 2013

Pin Pendant

Materials: Pin Converter, $1.00

Time: 2 minutes


This is a really quick and easy jewelry refashion. I had a pin that my mother-in-law gave me, and which I really liked, but I’m not really a pin person... I wanted to turn it into a pendant so I could use it on a necklace. So I went to our neighborhood bead store thinking I would get a small hook or ring that I would improvise and somehow attach to the pin to turn it into a pendant. However the attendant brought to my attention that there is a “pin converter” that serves exactly this purpose! And it only costs $1! I purchased it and quickly slipped it on to pin, and now I can wear it as a necklace pendant. The nice thing is that it is completely reversible and you only need one converter which you can interchange with other pins. This little discovery has completely changed the way I think of pins…

October 18, 2013

Hippie Chic


Materials: PainterTM Fabric Marker in Black, $3.99

Time: 1 hour and 20 minutes


This white shirt was a real discounted bargain I got at H&M. After 2 washes it lost its shape and was looking really shabby. I didn’t think anything would really work in trying to make it be something that it never was, so I decided to keep it shabby and go for a hippie refashion.


I searched for a cool peace sign image online, downloaded it, and sized it to fit the shirt. I printed it out and pegged it to a clipboard underneath the shirt. The print was easily visible and I was able to trace it with a light pen. Then I took the fabric marker and went over it. The secret to using this thick marker was to “tattoo” over the lines instead of gliding it, like you would normally use a marker. For copyright reasons, I did not copy the design exactly and I will not include it on this website. The fabric paint dried a little stiff, but after a wash the shirt looked awesome! Peace.


October 16, 2013

Blah Blah Black Shirt

Materials: Clorox Bleach Pen (3), $3.09 each.

Time: 3 rounds 30 minutes each.

 
This shirt was one of the leftovers from our last clothing swap. There was nothing really wrong with it, but I guess it was a little too blah for anyone to claim it. Since the swap was at my house I ended up with all the leftovers, including this boring black shirt.


I decided to transform it using a Clorox Bleach Pen. My inspiration was one of my little B’s scribble drawings, the most primitive form of visual expression, I suppose. I first tested a small spot under the collar in the back, to make sure the bleach would work. It took about 20 minutes, but finally the area which had been treated turned an orange-tinge. So I proceeded to scribble the shirt, starting with the back. The result was really dramatic! I washed the Clorox off three times with warm water and then threw the shirt in the wash. Once it dried, I repeated the scribbling in the front and sections of the sleeves. After 2 more rounds of scribbling, washing, and drying, the shirt was completely transformed and now it’s a whole lot more exciting!
 
Now I have to admit, its a little over-the-top for me to wear as-is, but I think it looks pretty cute under this neutral tan sweater or similarly with a black sweater. The way to pair it is to just assume the lines are tan and go from there.

October 15, 2013

The Cardigans

Materials: Fashion GlitterTM by Tulip, Scotch Blue Painter’s Tape, paint brush
Time: 1 hour


This was a black cardigan my friend M gave me a while back. I wore it since then and now it was looking a little too tired and the black starting to fade. Faded black clothing items are one of my top fashion pet-peeves, so I was really tempted to toss this cardigan. But upon closer inspection, it appeared to be faded only around the collar and the button-hole stitching. So I decided to re-vive it with some black sparkly fabric paint. I trimmed the buttons and button-holes on the two front sides with painter’s tape, and began painting the strip and collar. Two coats and it was ready. Super easy and cute!
 

October 14, 2013

Dip-Dye Skirt

Materials: Rit Dye in Black, $1.99

Time: 45 minutes


So while I had the black dye out after making the infinity scarf, I decided that it would be really cool to have a matching skirt to wear with it. The color the scarf turned out was perfect for fall, and I felt that I could sacrifice one of my summer skirts to make one that was more appropriate for post-labor day. So I decide to dye my white eyelet skirt which I acquired (guess where) at our last clothing swap. I simply held the skirt upright into the pot containing the black Rit Dye and let it absorb for a good 10 minutes. The I held the bottom dyed sections under running water for a long time, until the water began running clear. Then I submerged it into the sink filled with water, let it soak for 10 minutes, and emptied out the water. I repeated this 2 more times then threw the skirt in the wash with hot water. When I pulled it out it was the exact same color as my scarf with a degrade towards graphite at the bottom. I wore the combo skirt and scarf the very next day to the office. Love it!


Infinity Scarf


Materials: Rit Dye in Black, $1.99

Time: 45 minutes


So guess who’s rack I hacked this weekend? Hubby’s! He decided to clean out his closet and I stopped him halfway out of the garage. In his “trash” bag, I found 4 perfectly recyclable T-shirts. Men’s T’s are great for infinity scarves. They are larger than women’s (hubby wears size XL); and amazingly, there are no seams! You can get 2 scarves per shirt, plus leftover material for rags for household use.


There are so many different things you can do with a plain white infinity scarf. I decided to dye it using the folding technique I invented for my jeans (see post here). All I did was fold the scarf back-and-forth, back-and-forth, the whole way through. It took a couple of times to get a width which was even throughout. Once I did that, I rolled the scarf and secured it with an elastic band.
 
 
To dye the scarf, I dissolved the dye in hot water in an old pot, following directions on the box (I have a specific pot which I use only for this purpose). I chose Rit Dye in Black, because I wanted a neutral scarf that would go with anything. I dipped the scarf half-way into the dye and let it absorb the dye halfway up. Then I removed the scarf and let it sit in the sink for a couple of minutes so the dye would really impregnate the fabric. In the meantime, I filled the other half of the sink with cold water, and when I felt that the fabric had been dyed for long enough, I submerged it in the water and removed the elastic. I then washed it 3 or 4 times, and threw it in the washing machine on hot. When I pulled it out, I was surprised by a lavender scarf with graphite-colored stripes! It had turned out better than I had expected!


October 12, 2013

Dress Up!

Materials: Elastic, $2.79
Time: 30 minutes
 This dress was another one of my original refashions, so I again I have to apologize for not having any before pictures. But it was so easy to do, before pictures are not necessary. I acquired this skirt at a clothing swap I hosted back in 2008. It was obviously many sizes larger than mine, but I instantly envisioned it as a cute summer dress, so I quickly snagged it! To transform it into a dress, all I did was sew a piece of left-over ribbon on the inside to create a strip to secure the elastic band, leaving a small opening to insert the elastic. Then I inserted the elastic and hand-stitched the two ends together. Lastly, I hand-stitched the opening in the ribbon closed. I absolutely adore this dress, and recently bought this really cute stretchy belt with a leather flower to wear with it. The only unfortunate part is that summer flew by so quickly, I’ll have to wait a whole year to wear it again!

Leg Warmers/Boot Socks


Materials: Elastic, $2.79
Time: 30 minutes
 
This was an original refashion I did 3 years ago or so, so I apologize for not having a before picture. This was a very nice cotton-wool blend long-sleeve shirt I bought from Diesel. There was a cute “Diesel” embroidery on the sleeve. I bought this at some point in my mid-twenties and by the time I reached 30 I decided the shirt was a little too short (peek-a-boo midriff no longer acceptable). But I really loved the shirt, so I wanted to transform it into something wearable, keeping my favorite part which was the embroidery on the sleeve. On a night out with my friend M, she wore a black skirt and black heels with cute leg warmers. I decided that leg warmers would be the perfect project for this shirt! This was so easy to do. I simply cut the sleeves off and hemmed them with the zig-zag stitch on the sewing machine, leaving a small opening to thread the elastic in. Then I hand stitched the two ends of the elastic together and finished the hem on the machine. The nice thing about the zig-zag stitch is that you can just cut the fabric on the reverse and it won’t fray. It’s a quick and easy way to hem for those of us that don’t have great sewing skills. And with that, my cute leg warmers were made!

October 11, 2013

Cloth Book Bag

Materials: Iron-on Repair Patch, $1.89

Time: 1.5 hours


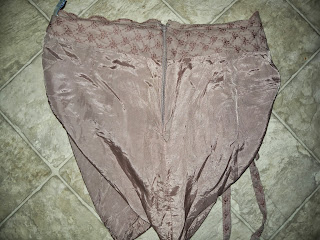
This skirt was acquired during our last clothing swap. It was pretty cute, but too big for me. It took a lot of brainstorming, but I finally decided to turn it into a cloth or book-bag. The belt could be used as the straps and the zipper made into a pocket for keys or my cell phone.

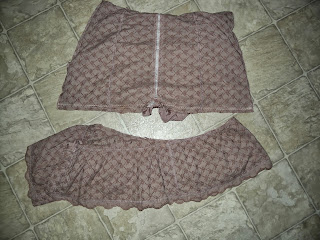
I started off by chopping off the bottom. I turned the skirt inside out and sewed the outer fabric together making the bottom of the bag.


Then separately I did the same with the inner linning, leaving a small opening to reverse the bag back to the correct side.


Then I took the bottom part of the skirt and cut it in the shape of a pocket and sewed it together on either side of the zipper.


I reversed the bag and tied the two ends of the belt together to see the result. The bag turned out great, but it was a little flimsy. So I took iron-on repair patches and reinforced the bottom. Now the bag was too stiff to completely reverse the corners, so I stitched the corners perpendicular to the bottom stitching.


After reversing the bag I was absolutely thrilled! The final step was simply to hand stich the opening I left in the lining, and the bag was finished! Great for a quick trip to the store or the library with little B.